
I’ve written a training session about whiteboard work designed for our CELTA level teachers. After the last round of teacher observations we established that boarding new/emergent vocabulary was an area for development. This session includes some tips to help teachers develop their technique. It’s primarily aimed a less-experienced teachers – I remember this topic being covered on the CELTA but it’s something that’s easy to let slip (in my opinion!).
What you need for the session:
Each pair/group of teachers will need to work with a whiteboard. It is possible to get 3 standalone whiteboards in our classrooms, but that might not be practical for you. Alternatives might be using mini-whiteboards (if big enough) or A3 paper. The paper might be a nice record for after the session. Teachers will also need a set of coloured whiteboard pens (coloured pens if using paper). Two or three colours should be enough.
The flipchart slides need a projector/IWB.

STAGE 1 – Lead in
The section starts with a chat about teachers’ current practice…
- How would you rate your board work skills?
- What are you good/bad at?
- What are you like at boarding emergent language?
- What information might you add to the board when you teach a new word?
The next stage is sort of diagnostic, done as a game. Teachers work in pairs/threes. A ‘new word’ is displayed on the flipchart. Teachers write this on their board and display any info related to the word that they think is useful/necessary for the learners.

Allow 1 minute then move the box on the flipchart to remove an example of how the word could be displayed on the board.
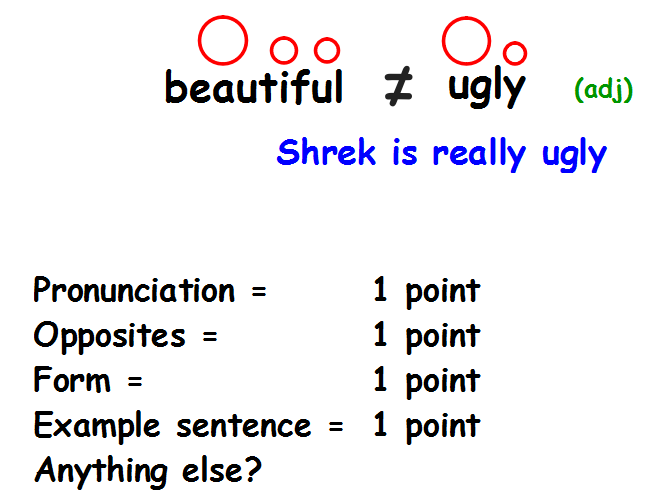
Teachers get a point for every feature they have included that is the same as the example on the board, and also a point for other relevant features they’ve included.
They repeat this four times with different words. The point is not to guess exactly what is in the example! That just serves as a prompt, and each of the 4 examples has something extra which the teachers could include (if relevant). Examples:

Collocations, related phrases

Short definitions, other word classes
Etc.
This stage is followed by a brief summary, relating back to lead-in question 4:
What information might you add to the board when you teach a new word?
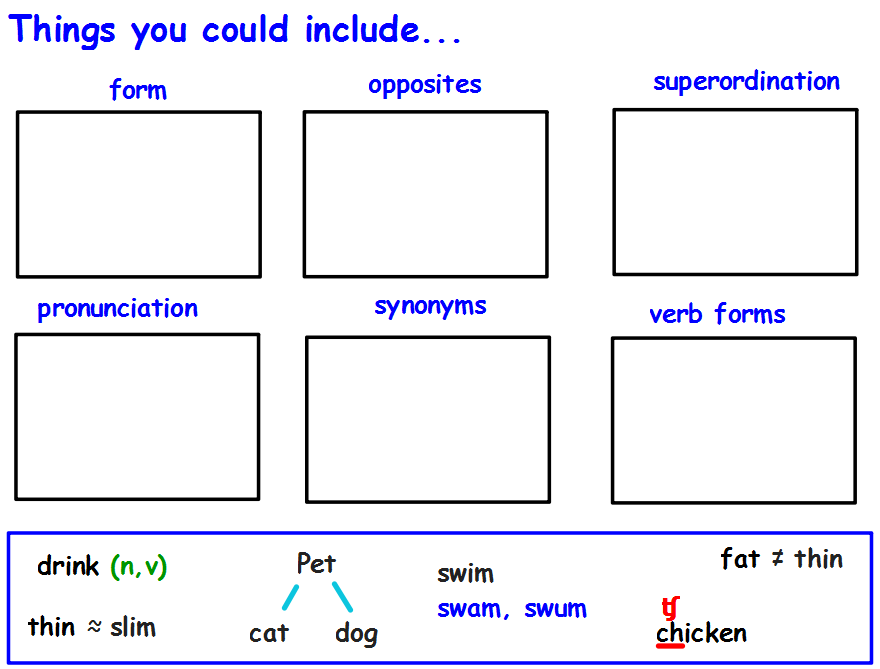
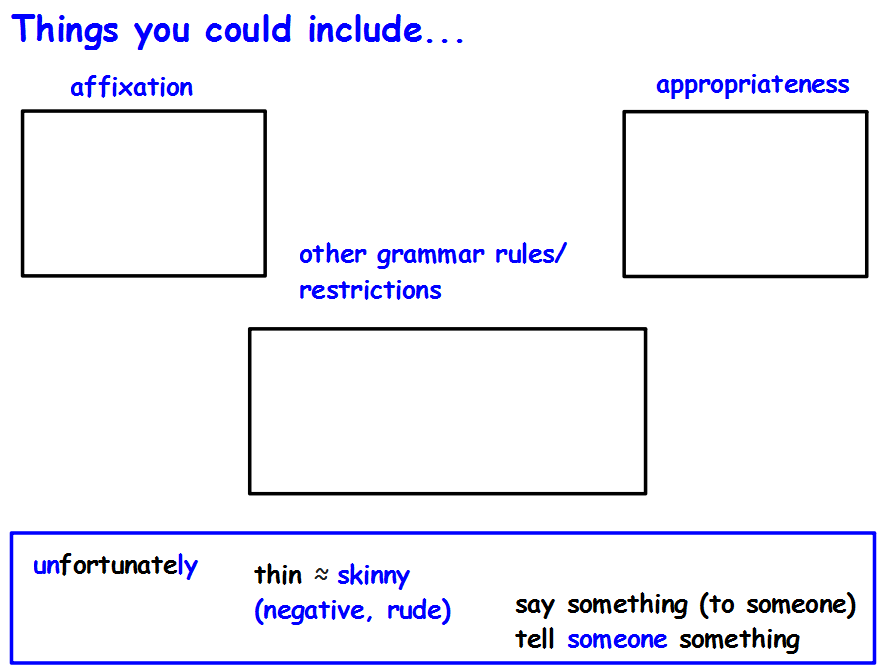
STAGE 2a – Review techniques
Give teachers loads of examples of things that they could include on the board when they add a new word. I’ll do this as a very quick discussion for each slide then match the correct example in each box…
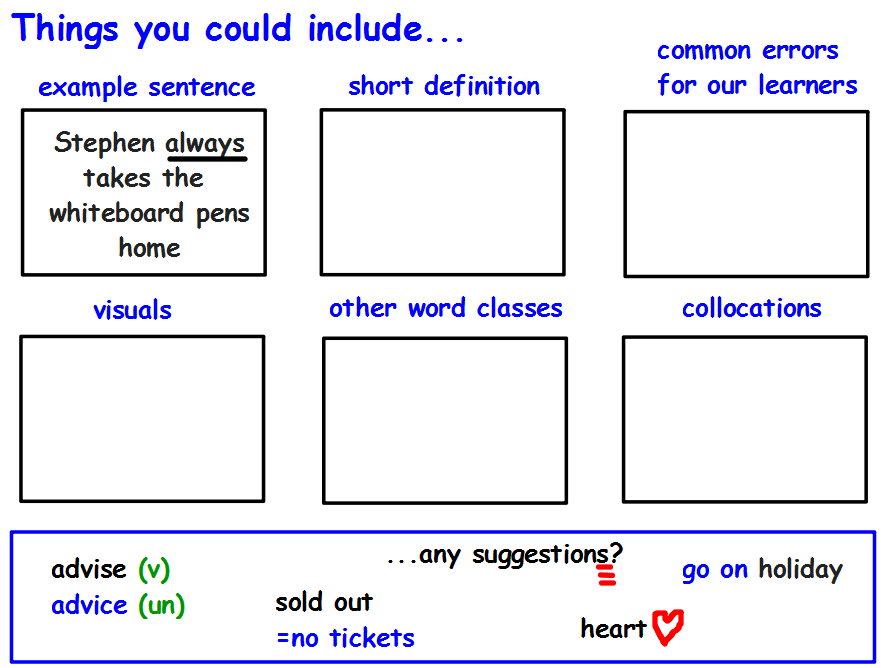
(Note: my mate Stephen DOES always take board pens home)
There are probably a lot more things you could include – teachers will hopefully mention these during the session. You can change any examples to suit your context – especially the one about typical errors (ours is the learners missing the final ‘s’ sound). It’s up to you!
After introducing these, I share a few tips (see flipchart). Including…
- You don’t have to explain EVERYTHING! Consider what is relevant and appropriate for your learners
- Boarding chunks rather than isolated words is useful (I recommend a collocations dictionary like just-the-word to help with that)
- Written and spoken forms in English often differ so don’t forget guidance on pronunciation. Also, there’s more to pronunciation than sounds and word stress – highlight a few symbols teachers could use for intonation, pausing, etc
- Colour coding is useful, and learners get used to it
- Organising your board also helps learners (and you) know what info will appear and where (see my old post for an example)
- Students like to take photos of info on the board, so make it look neat!!!
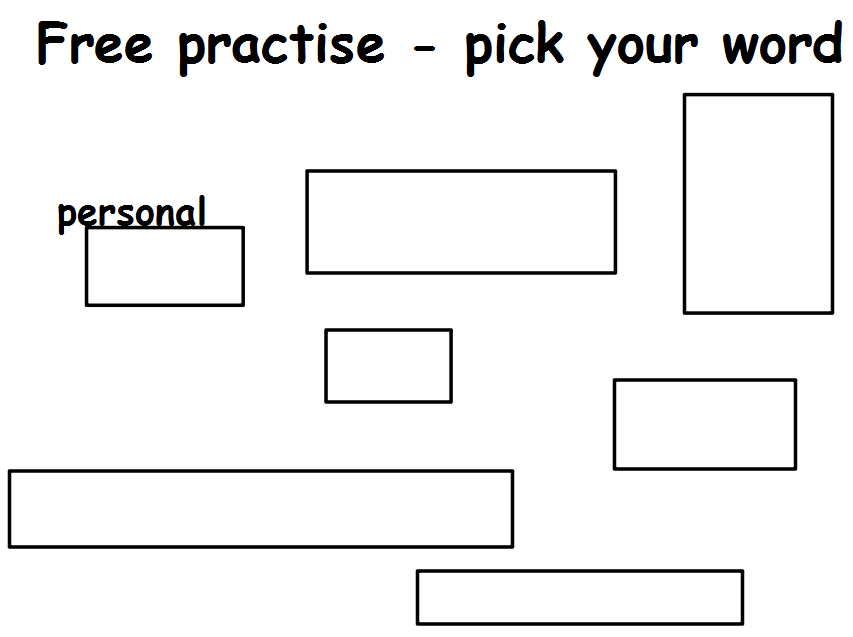
STAGE 2b – practice techniques individually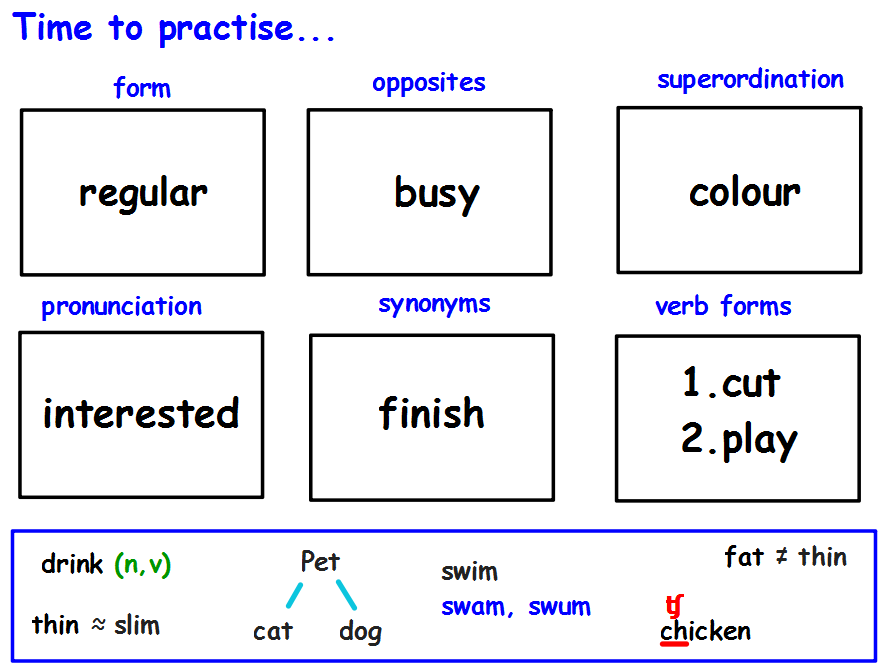
Next, teachers work together to practise the techniques. I’ve put an example word/phrase in each box (see below), and they can practise boarding this info. The examples remain on the slide in case they need examples again! Take them away or cover them if you want.
All techniques will be practised so you might want to split this up, or ‘just practise the ones you’ve never used’, etc. Up to you.
STAGE 3 – free practice
List a load of random words on the board. Teachers work together and practise adding the word and appropriate features to the board (whatever they feel is relevant).
It would be useful to adapt this section and give a context to the teachers. For example, you could mention whether they are introducing the word to adults, teenagers or YLs – this may change the techniques they use. Maybe the example words could all be from one unit that is being taught at your school. Up to you…
End with a recap and follow up ideas:
- Taking photos of your own board work and getting feedback from colleagues
- Following the #ELTWhiteboard on Twitter (Jenni Fogg is posting up some great stuff at the moment
- etc…
you can download the flipchart for this session here
Categories: General, teacher development

This is really useful, Peter. I’m going to share this post on the Teach English in India FB community: https://www.facebook.com/TeachEnglishInIndia
LikeLike
Nice one cheers!
LikeLike